Sunday, June 2, 2013

Monday Treats, Mini Cheesecakes

At my work, we all take turns bringing treats for the staff on Mondays. It's a nice way to ease ourselves back into the work week, a little something to look forward to on Monday. We are such a small staff we all have multiple turns to bring snacks.

This kind of thing is right up my alley. I love to cook (obviously if I have a food blog). But this year I am an empty-nester. Cooking for myself just isn't very fun. Monday treats provides an excuse to try out new recipes and not be the only one eating it.

These cheesecakes are super easy, only six ingredients. And they are light and fluffy, mildly sweet. They are
an excellent spring treat. They'd be great to take to a potluck.

Mini Cheesecakes
INGREDIENTS
12 vanilla wafers
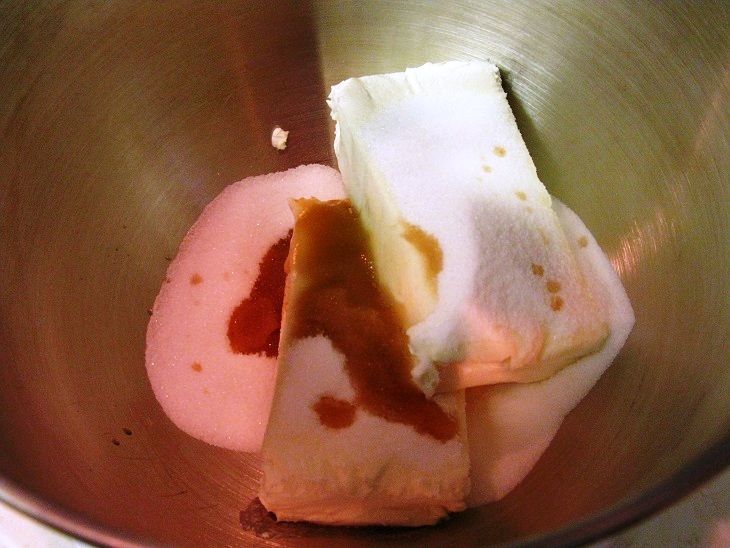
2 8 oz packages of regular cream cheese, room temperature
1/2 cup sugar
1 teaspoon vanilla
2 eggs

Desired topping such as cherry or other fruit pie filling, chocolate chips, pecans, any variety of jam, caramel, whipped cream, etc.

1) Preheat oven to 325 degrees. Place 12 foil cupcake cups in a cupcake pan.
2) Place 1 vanilla wafer in the bottom of each cup.
3) In a large electric mixer, place cream cheese, sugar, and vanilla. (If you want you could also add lemon or orange vest for flavoring.) Beat together until well blended and smooth. Turn off the mixer and scrape down the sides.
4) Turn the mixer on medium and add one egg at a time. Blend until fully incorporated and smooth before adding the second egg.

5) Mix on medium high for another 2-3 minutes. 
6) Use a spoon to scoop the cream cheese batter to fill each foil cup about 3/4 of the way full. Share it out evenly between the 12 cups. 

If you are using chocolate chips, nuts, jam, or caramel topping, now is the time to add about 1 teaspoon to the top of each mini cheesecake. You can swirl in the jam or caramel a little with a toothpick. If you are using canned pie topping, as pictured above, or whipped cream save it until after the cheesecakes are cooked and cooled.
7) Bake in the oven for 25 minutes. Cheesecakes will puff up a lot. They will sink back in as they cool creating a perfect little divot for pie filling or whipped cream. Cool completely before topping with pie filling or whipped cream.


Easy Mini Cheesecakes

Monday Treats, Asian Chicken Salad

I love making new recipes. Often I come across a new recipe. Fix it. It turns out wonderful. And I never make it again. There's just so many recipes to try, there's not really time to make recipes more than once.

And then there are my reliable stand-bys. The recipes that I make over and over. The ones that I just have to have from time to time. This Asian Chicken Salad is just one of those recipes. About once a month, I eat Asian Chicken Salad. I have a wide range of variations I make. You can use lettuce or cabbage or both. You can make it with leftover grilled or roasted chicken breasts or thighs. I like to buy a cold rotisserie chicken from the grocery store to make it quick and easy. You can add cucumbers, snow peas, green onions, orange segments, bean sprouts, cooked ramen noodles, blanched broccoli florets. You can top with cilantro, mint, basil, ramen noodles, wonton strips, almonds, sunflower seeds, sesame seeds, peanuts, chow mien noodles. The dressing can be store bought Asian style dressing. Or you can make your own with rice wine vinegar, canola oil, and sugar and any add-ins such as the flavoring packet from one package of ramen noodles, juice from canned mandarin orange segments, grated fresh ginger, lime zest, a few drops of sesame oil.

Here is a basic recipe for Asian Chicken Salad. Feel free to make any variation you like from it. Just think of your favorite flavor combination from any Chinese, Japanese, or Thai dish, and add those ingredients.

Asian Chicken Salad
INGREDIENTS
1 small Napa cabbage
1 small savoy cabbage
6 green onions
1/4 pound snow peas
1 grocery store rotisserie chicken
2 packages chicken flavored ramen noodles
(Save 1 flavoring packet)
1 cup slivered almonds

Dressing: 3/4 cup canola oil, 1/4 cup rice wine vinegar, 1/4 cup sugar, 1/4 cup juice from canned mandarin oranges, 1 flavor packet from chicken flavored ramen noodles

1) Put all of the dressing ingredients into an empty, clean medium-sized jar. Shake well for 1 or 2 minutes until well blended.
2) Thinly slice Napa and savoy cabbages. Slice green onions and snow peas on the diagonal.


3) Take all of the chicken off of the bone from the rotisserie chicken. Dice.


4) You can toast the ramen noodles in a pan over medium heat until they start to turn light brown. Add the almonds at this point and toast a little longer until the almonds turn light brown as well. You don't have to do this step, but it does add a nice toasty flavor. Just be careful to stir a lot and watch the pan carefully. Ramen noodles and almonds can go from too light to way too toasted very quickly.
5) Add everything to a very large salad bowl. Give the dressing a good shake again. Pour over the salad and toss.


Asian Chicken Salad, delicious, versatile recipe

Wednesday, May 29, 2013

Easy Tomato Bruschetta (inspired by the movie "Julie and Julia")

I like the movie "Julie and Julia", maybe it's a bit of inspiration for my entire blog. I know it's the inspiration for one item on a bucket list, to cook my way through an entire cookbook. I won't be cooking my way through Julie Child's book "Mastering the Art of French Cooking". I love french cooking, but I do not want to commit myself to an entire aspic chapter. Ugh.

I do have one more inspiration from that movie however. Early on there is a scene where Julie and her husband are eating the most amazing tomato bruschetta for dinner. The movie shows Julie frying the bread before serving. I've watched the movie a couple of times recently and was just craving the bruschetta they gushed over.

I created this very easy recipe simply from what Julie's looked like. It may not be their recipe at all. But it is delicious, quick, and simple.

EASY TOMATO BRUSCHETTA
INGREDIENTS

Fresh tomato, diced, the fresher the better, it is the entire basis of the flavor in the recipe
Fresh basil, thinly sliced
1-2 tablespoons olive oil
Salt to taste

Sourdough baguette
Butter
Olive oil
Parmesan

1)Mix the first four ingredients in a bowl and set aside so the flavors can meld.
2) Slice the baguette and butter one side. Fry in a pan with some olive oil.
3) Pile the tomato mixture on each slice of fried bread. Top with a little shaved Parmesan if desired. 
That's it! Sever and eat! So good! 

I had it by itself for dinner. More commonly it is served as an appetizer. Or you can have it with a nice piece of cooked fish, chicken, or beef with a green salad and have a complete meal. 

You can also add all kinds of things to this recipe; crushed garlic, a little balsamic vinegar, shredded tarragon, finely chopped olives, a few capers, ground pepper, parsley, or whatever you think works. Go wild. Be crazy. The best bruschetta I've had lately was strawberries and kumquats with mint and goat cheese on a rustic whole grain bread. It was absolutely amazing.
Strawberry Kumquat Bruschetta from Thomas Hill Organics

Pottery, piece 2

My second pottery piece
Here is my second pottery piece ever. I started it the same day as my first piece. Recently I threw down for the first time. I think that's the proper way to say I used the pottery wheel. That definitely takes some talent and skill. I have way more appreciation now for the handmade pottery I see. I started okay, but somehow always managed to dig a finger in too deep. I'd get this deep groove or gauge in the pottery that I couldn't figure out how to work out. Time and practice, I'm sure that is the key.

I've glazed the two thrown pieces I made and left them to be fired. I will post pictures soon.

Saturday, May 4, 2013

Pottery

For about three months now I've been going to hang out with a friend on Friday nights at a local pottery studio. Oh my wild party life.

I've never done pottery before in my life, but it's fun. A lot like being a kid playing with playdough. I always loved playdough. My first two pieces were trays. You cut a chunk of clay out of a block of clay and roll it flat through a press. Then you mold the clay into a form. On my pieces, I stamped designs. After they dried, and when I could finally make it back to the studio, I painted each piece. I left them to be fired. I do wonder if the glaze I used gives it the high gloss finish just by being fired. You would never know to look at the unfired item to know what the finished product will look like. Unfired they are dull, porous, and not glossy at all. Here is my very first piece.


Friday, April 5, 2013

Spring Dinner (recipe for Shaved Asparagus Salad with Peas and Goat Cheese)

I love any reason to eat goat cheese. It's my new gastronomic obsession this week. Add to that it's asparagus season and how could there be any more wonderful salad than Shaved Asparagus Salad with Peas and Goat Cheese. It's fabulous. It's flavorful. It's Spring-y. It's heaven. I think I will be eating this one a lot this Spring.

Shaved Asparagus Salad with Peas and Goat Cheese
INGREDIENTS

1 cup fresh peas (I couldn't find fresh; I had to use frozen)
1 bunch/pound asparagus 
4 T olive oil
1 T fresh dill
6 T fresh parsley
2 smallish cloves of garlic
Salt and pepper to taste
1 oz goat cheese


1) Cut the tips off of the asparagus. Snap the woody ends off. Use a vegetable peeler to shave the asparagus lengthwise.
2) In a pot of boiling water with salt, blanch the asparagus for 1 or 2 minutes. Not too long. You don't want it mushy.


3) Immediately after removing the asparagus from the boiling water, dump it in a bowl of ice water to stop the cooking process and keep the bring green color.
4) Repeat steps 2 and 3 with the green peas. If the peas are fresh they may take up to 5 minutes to cook.
5) In a food processor or blender, puree the olive oil, herbs, garlic, and salt and pepper. You can use other herbs if you
wish. Tarragon, chives, or basil would also be good. A few drops of lemon juice would also work.
6) Toss the dressing with the asparagus and peas. Place in individual salad bowls. Two bowls for larger servings, four bowls for smaller servings. Divide the goat cheese over each. Sprinkle with salt and fresh ground pepper. (I added some lemon peel on mine, it was a perfect addition.)

To make this an excellent, light Spring dinner serve it with simple roasted salmon. 

ROASTED SALMON

1) Preheat the oven to 400 degrees 
2) Rinse and dry a salmon fillet. Sprinkle with salt and pepper. 


3) Roast in the oven for about 30 minutes. 

4) Divide and serve.


Tuesday, April 2, 2013

Brownies

Why use a box mix when making brownies is SO easy? It's easier than cookies where you have to cream butter, sugar, and eggs. It's easier than cake where you have to alternate wet and dry and be careful with the mixing. Brownies are just easy.

Easy Brownies
INGREDIENTS

1/2 cup butter, melted
1 t vanilla or instant coffee granules dissolved in 1 T hot water 
2 eggs
1 cup sugar
1/4 cup cocoa powder
1 cup flour
Non-stick cooking spray
Any goodies you like in a brownie

1) Preheat oven to 350 degrees.
2) Whisk butter, vanilla and/or coffee, and eggs together.
3) Stir in sugar.


4) Mix in cocoa powder thoroughly. Gently stir in flour until just incorporated.


5) Spray 9x9 baking pan with non-stick cooking spray. Spread brownie batter evenly into pan. (This is the time to add whatever goodies you like in brownies. Chocolate chips, nuts, marshmallows, or caramel sauce are all good stir-ins. You can go crazy and add peanut butter cups, cheesecake filling, or cherry pie filling. This time I added some warmed up fudge topping. It made chocolatey, gooey swirls in the brownies.)

6) Bake at 350 degrees for approximately 30 minutes, until the middle is completely set.

If you like frosting on your brownies, let it cool completely and frost. Sprinkle with nuts or rainbow sprinkle.


I love brownies. They are such versatile comfort food.
Easy Brownies, oh-so-chocolatey and gooey