Tuesday, July 31, 2012

Adventures in fire fighting

So I was driving home from work this afternoon, and as I was approaching town I saw black smoke over near my house. As I got closer, I realized it was really near my house. Six foot high orange flames were shooting up at the corner of the street and the alley three feet from the back fence of a vacant house.

Called 911. The operator complained I was yelling at her. Sorry, the alley is on fire and it's really near a house. I was as calm as I can be in an emergency. Apparently, I yell.

The Boy, a woman in a white van, and I ran around banging on neighbors' doors, trying to get them into action. Within minutes pretty much everyone on the block was in the alley, bringing fire extinguishers, hoses, shovels, hoes. It was quite a testament to neighbors who are practically strangers banning together. 

The neighbors had most of the flames out. We fought it back from the houses, and got most of it out by the time the fire department arrived. Luckily, they were there to put out all the hot spots and kill the last few flames that were making their way up some trees.
Fire across the street from my house.
Fire fighters putting out the hot spots.
Fire truck at the end of the alley. That's the corner where the fire started.
Fire right by the road.

Thursday, July 26, 2012

Apricot Clafoutis

Apricot season is almost over here at my house. I have just a few left on my tree. The last will be made into apricot syrup for pancakes, waffles, and biscuits.

But these apricots were made into something lovely: Apricot Clafoutis. Clafoutis is a french dessert of fruit covered in a flan. Really very light, yet summery and sweet-tooth satisfying, even for a dieting dessert addict like me. Super simple and easy to make.

Apricot Clafoutis
INGREDIENTS

8-10 apricots
cooking spray
1/4 cup sugar
2 eggs
1/3 cup nonfat canned milk
2 T flour
1 1/2 t vanilla


 1) Preheat oven to 375 degree. Spray a pie pan with non-stick cooking spray. Wash, halve, and remove pits from apricots. Arrange them around the bottom of a pie pan.
2) Beat the remaining ingredients together and pour them over the apricots. 


 3) Bake at 375 degrees for about 15 minutes just until the eggs have puffed up and the edge turns a golden brown. 
Serve warm!

Saturday, July 21, 2012

Practicing for food for one (Broiled Salmon with Mustard Cream recipe and Black Bean and Corn Salad recipe)


The Boy is out today and all night tonight. So I'm having another practice run at being an Only Bird. As it is, there is only one month until he moves off to his college dorm, and I will be an Only Bird practically full time. He says he is coming home every weekend, but I'm wondering how long that will really last. We shall see.

So today was spent on food projects. After taking Maxi for a walk in the park, I made a delicious scrambled egg pita pocket.
Then picking veggies in the garden, Roasted Tomato Soup, and a fabulous dinner for one of broiled salmon, black bean and corn salad, and the aforementioned tomato soup.


Broiled Salmon with Mustard Cream
INGREDIENTS
5 oz salmon fillet
salt and pepper to taste
1 T sour cream
1/2 T whole grain mustard
1/2 t lemon juice
1) Preheat the broiler. Spray non-stick cooking spray on a square of foil. Place the fillet on the center of the foil. Season with salt and pepper.
2) Mix the remaining ingredients together. Spread the mustard cream over the salmon fillet.
3) Broil the salmon for about ten minutes or until the top is bubbly and brown.

Black Bean and Corn Salad
INGREDIENTS
1 can black beans
1 cup corn
1 1/2 cup cherry tomatoes cut in half
1/4 cup parsley, chopped
1/4 cup cilantro, chopped
2 scallions, diced
2 T lemon juice
1 T garlic, crushed
2 T olive oil
Salt and pepper to taste
1) Mix all of the ingredients together. Done!

Roasted Tomato Soup

I love summer. Mostly because school is out and my job is 100 times easier with no children at work. The other great thing about summer is tomatoes. Tomatoes are wonderful diverse food that can be anything. I am happy eating tomatoes every day at any meal.

This tomato soup is full, rich, mildly sweet. It's simple and lovely. It can be the base for other soups, like gazpacho, or just good on its own. It takes some time, but it easy and worth the wait.

Roasted Tomato Soup
INGREDIENTS

3 pounds roma tomatoes 
olive oil
1 red onion
1 shallot
3 cups chicken broth
salt and pepper


1) Preheat the broiler. Line the broiler pan with foil. Cut each tomato in half and lay them out on the pan. Drizzle olive oil over the tomatoes.


2) Broil the tomatoes for about ten minutes or until blistered and charred.
3) Let the tomatoes cool completely. Gently peel the skin from each tomato. Cut the stem end from each one.
4) Dice the shallot and onion. A trick to tear-free onion cutting: place the onion in the freezer for about five minutes first. No more tears!
5) Saute the onion and shallot in a large stock pot with a little olive oil until tender, about ten minutes.
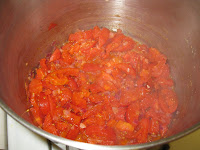
6) Roughly chop the tomatoes and add to the stock pot. Add salt and pepper to taste. Try to be on the light side. It's always easy to add more salt later. It's hard to take it out. Cook over medium low heat for about 15 to 20 minutes to develop the flavors.
7) Cool the tomato/onion mixture until cool enough to handle. Pour in to a blender or food processor and blend until smooth.
8) Return to the pot and add 3 cups of chicken broth. Simmer over medium heat for 15-20 minutes. Add salt and pepper to taste.
A little basil and some fresh ground pepper. Yummy!

Wednesday, July 18, 2012

Apricot Leather

Apricot experiment #2: Fruit leather
I'm still working my way through that five-gallon bucket of apricots before the next batch is ready to be picked. I remember as a kid my mom making fruit leather, long before Fruit Roll-ups were ever available in a store. I always wondered when Fruit Roll-ups did come on the market at who stole my mom's recipe.

So for this happy childhood memory, I thought I would give it a try. I made the fruit slurry as I had with the jam. Two or three pounds of apricots washed, pitted, and put in a large pot. This time I added a bit more water, maybe 1/2 cup. I simmered the fruit in a covered pot of medium low heat for about an hour until very soft and falling apart at the touch of a spoon. I then added 1/2 cup of sugar and simmered for another 30-45 minutes. I took the pot off the heat and let it cool until it was cool enough to put in the refrigerator overnight.

The next day, I blended the fruit in the blender until smooth. At this point it would make an excellent syrup for waffles, but of course, that wasn't my goal here.

Apricot Leather
INGREDIENTS


1 batch apricot slurry as described above


1) Preheat oven to the lowest setting possible, 150 degrees or less. My oven's lowest setting is 200, so I kept having to try to guess at what spot on the knob was lower but not off.


2) Line a baking sheet with plastic wrap. Pour the slurry into the center of the plastic wrap and spread it out evenly to all corners.


3) Place in oven for 8 to 10 hours, this will dehydrate the mixture. I assume if you have a handy-dandy dehydrating machine, you could use it too.


4) When the slurry is dried but still kind of "rubbery" all the way to the center, remove from oven and let cool.


5) Spray parchment paper with cooking spray. I would think if you have wax paper, you could use this too and possibly avoid using the cooking spray.


6) Place the cooled fruit leather in the center of the prepared parchment paper. Using kitchen scissors, cut into desired serving sizes. My sheet pan made about 10 servings.


7) Roll each section in the parchment paper and take shut. Store in a plastic bag.


Tuesday, July 17, 2012

Rice Pilaf

Rice pilaf is a simple dish, but perfectly wonderful with a vast array options and varieties. The Boy asked tonight, "Is there anymore of that rice stuff? It was really good." High praise from a teenager.

Here's my praise-awarding version.

Rice Pilaf
INGREDIENTS


1 T olive oil
1 diced carrot
1/4 large onion, diced
1 cup chicken broth
3 cups leftover cooked brown rice
2 green onions, diced
1 small tomato, diced
Salt and pepper to taste


Heat olive oil over medium heat in a dish pan. Add carrots and onion. Try to dice both to the same size so they cook equally. Season with salt and pepper. The salt helps the vegetables to release some of their liquid. Cook until softened.


Pour chicken broth into the skillet. Scrap the sides and bottom so all the bites loosen. Add rice and heat thoroughly. Turn off heat and add green onions and tomatoes. Stir in. Add salt and pepper to taste.

Sunday, July 15, 2012

Apricot cake

I have a new garden challenge. What to do with a 5-gallon bucket of not-so-pretty apricots? This is the first year the blossoms on my apricot tree actually set instead of dropping off in a late frost. Unfortunately, most of them are not the best looking. So lovely little tarts and hor d'oeuvres with goat cheese are out. I'm left with salsa, chutney, and jam.

My first strategy was to make refrigerator jam. I'm sorry to say, I forgot to take pictures of the process, but it was quite simple. Remove the pits from however many apricots you wish to use. I did about half of the bucket. Heat in a pot over medium heat. Add about a 1/2 cup of water just to get the pot going a bit. Cook for about an hour. If the contents boil, turn the heat down a bit to keep it at a simmer. Occasionally give the apricots a stir and mash them with the back of the spoon.

I did not want my jam too sweet so it had some versatility. You can always add more sweetness; it's hard to take it out. I added only a 1/2 cup of sugar to the whole large pot. Continue to cook for another 15 minutes so the sugar is good an dissolved. If need be, blend the jam in a food processor or blender until the desired chunkiness. I used a stick blender in mine until it was about half chunky.

Pour carefully into jars and refrigerate. I can't say authoritatively how long it will stay good in the refrigerator. One website I read said "up to one year." That sounds like a reasonable estimate to me, just like any other jelly. It is not sterilized and sealed, so it can't be kept on a shelf.

So, the title promises an apricot cake. Here's where the jam comes in, layers of apricot jam between orange scented white cake. Yummy.

Apricot Cake
INGREDIENTS
1 white cake mix
3 egg whites
1/3 cup canola oil
1 1/4 cup water
Zest of one orange
1 teaspoon orange extract
6 apricots diced


2/3 to 1 cup(s) of apricot jam
4 cups of powdered sugar
1/3 cup fresh squeezed orange juice
1/2 cup butter


Preheat oven to 350 degrees. Prepare two 9-inch round cake pans with oil and flour. Mix the first six ingredients together until blended. Beat with a mixer on high speed for about 3 minutes until fluffy. Divide the cake batter into the two pans evenly. Sprinkle in diced apricots. Bake at 350 degrees for 30 minutes.


While cakes are cooling, prepare the frosting. In a sauce pan over medium heat, melt butter. Let it cook until it starts to turn light brown. Pour butter and orange juice into the powdered sugar. Whip well until light and fluffy. 


Assemble the cake: Cut each completely cooled cake round in half. Place the first layer in the cake dish and cover with half of the apricot jam. Add the next cake layer. Frost with 1/2 cup of frosting. Cover with the next layer and spread on remaining jam. Gently place the last layer and frost the cake all around with the remaining frosting. Voila! Perfecto.


(I know my cake is two-tone. I made too little frosting at first and had to make an extra cup to finish the outside icing. This is how I learned you need four cups of powdered sugar. I didn't brown the butter or use fresh o.j. Hence the color difference. Still tasted really good.)

Friday, July 6, 2012

Am I a Food Blogger?


I found this article "Top 10 Ways You Know You're a Food Blogger" on http://laphemmephoodie.com by Wendy Kirby. So I asked myself the question, "Do I fit these criteria?"


10.) Your food goes cold while you get the “perfect” photo. Ummm... not quite that extreme. I do try to get a bunch of photos before I eat, but I'm usually too excited to eat my creation to spend too much time shooting pics.
9.) When someone tells you the dish you made was good, you then pepper them with 20 questions about what they mean by good. Well, for right now, when someone tells me my dish is good, I say, "Really? I posted it on my blog. Here's the URL. Here's the recipe."
8.) Your wish list is full of kitchen gadgets. I have been craving kitchen gadget shopping lately. I've been online window shopping websites. And I've browsed kitchen sections in stores. I've also been thinking of going to thrifty stores looking for interesting plates and other dishes that will make the food look prettier in photographs.
7.) After taking a pretty good photo of your dish you then take 574 more just in case. I take two or three "just in case" shots.
6.) You know all the major food holidays better than your friends’ birthdays. I'm not a big holiday person, so I haven't gotten into this yet. I have been thinking about what I want to make for Christmas baking and candy making this year that might photograph well and be interesting recipes. It is only July, so maybe this stage is starting to set in. 
5.) Buying cookbooks has made such a dent in your bank account that your family is considering an intervention. I own too many cookbooks as it is. I have decided that I can find all the recipes I need online so why buy books (other than for the unique experience a book provides in and of itself). I do spend way too many hours perusing food blogs and watching cooking tv shows. 
4.) You plan your vacations around the food in that location. Absolutely! Isn't that what everyone does? Before I go anywhere, I research all the local restaurants and scout out all the unique, interesting, delicious places I want to try.
3.) Friends and family roll their eyes when you take out your camera at the table. My son is starting too. 
2.) It would take 365 years to make all the recipes you have saved. Easily.
1.) You embrace the word foodie with wild abandon. Yeah. I think so ,I've started calling myself "a bit of a foodie" for the past year or two.

Well, it seems I'm not a "Food Blogger" yet, but I might be well on my way to becoming one.

Tuesday, July 3, 2012

Creamy Zucchini Soup

All vegetable gardeners have the same issue: What do you do with all the veggies when they start to ripen at the same time? How many zucchinis can one person eat? I've had a bunch of great big ones. They aren't the best for eating whole. You have to scoop out the seeds in the middle that have gotten too big to eat. So far I've made stuffed zucchini and zucchini pancakes. Next on the list, yummy, creamy zucchini soup!
Creamy Zucchini Soup
INGREDIENTS
1 very large or 2-3 medium-sized zucchinis
3 cups vegetable or chicken stock
1 medium onion, chopped
Fresh herbs such as dill, chives, tarragon, thyme whatever
2 oz. of low fat cream cheese
1) Chop up the zucchini into chunks. If it is as large as the one I used, scoop out the seeds from the center. Discard. Add zucchini, stock, onions, and herbs to a large stock pot. Bring to a boil. Reduce heat to medium and simmer until the vegetables are very soft, about 15-20 minutes.
2) Remove from heat and allow to cool for about 30 minutes. Carefully scoop the soup into a blender so it is only about half full. Puree well. It may take several batches to do the entire mixture. 


3) Return the pureed soup to the heat stove over low heat. Add 2 oz cream cheese and stir occasionally until the cheese is completely melted and incorporated.
4) Serve. It is creamy and flavorful. It can be served warm or room temperature. It is a wonderful summer dish with a fresh salad and a sandwich.

Sunday, July 1, 2012

Chocolate Macadamia Biscotti

I decided I'd make my first try at biscotti. I had one on my trip to Mendocino and really liked it. Before that, I had only had packaged ones. They were always really hard and dry. They took a great effort to bite. But the one at the MacCullhan House Restaurant was crunchy and light. It was very good with the cup for cappuccino. So tonight I made Chocolate Macadamia Biscotti based on a recipe from foodmayhem.com called Chocolate , Macadamia Nut, and Ginger Biscotti at http://www.foodmayhem.com/2009/07/dark-chocolate-macadamia-nut-and-ginger-biscotti.html .

I wanted mine to be about 100 calories each to go with my healthy eating meal plan. The Calorie Count website (http://caloriecount.about.com/) has a recipe analysis function. So, I adjusted the recipe until it matched my requirements. Here's what I came up with. They biscotti are very good. Excellent with Sleepy Time tea.

Chocolate Macadamia Biscotti
INGREDIENTS
1 cup all purpose flour
2/3 cup whole wheat four
1 cup sugar
1 t baking soda
1/3 cup cocoa powder
1/2 t salt
4 eggs
1 t vanilla
1/2 cup macadamia nuts chopped
1) Preheat oven to 350 degrees. Mix all of the dry ingredients together.


2) Beat three eggs with vanilla and incorporate into the dry ingredients thoroughly. My mixture was a little dry (maybe because of the whole wheat flour, maybe because of the size of the eggs. Who knows. I added about 1 tablespoon of milk to make is a thick, sticky dough.)
3) Fold in the chopped macadamia nuts.


4) Line a baking sheet with parchment paper. Divide dough in half and pat out into 11x3 inch logs. Bake at 350 degrees for 35 minutes.


5) Take the biscotti out of the oven. Turn the temperature down to 325 degrees. Cool for about 10-15 minutes. Slice the biscotti into 1/2 inch slices and place back on a baking sheet. Return to the oven and bake for an additional 15 minutes.
6) Serve with tea or coffee. Each biscotti is approximately 100 calories. The recipe makes 48 cookies.